Mastering Tiptap – Adding Tables with a BubbleMenu
Published at 16-03-2025
See all the code for this branch on GitHub.
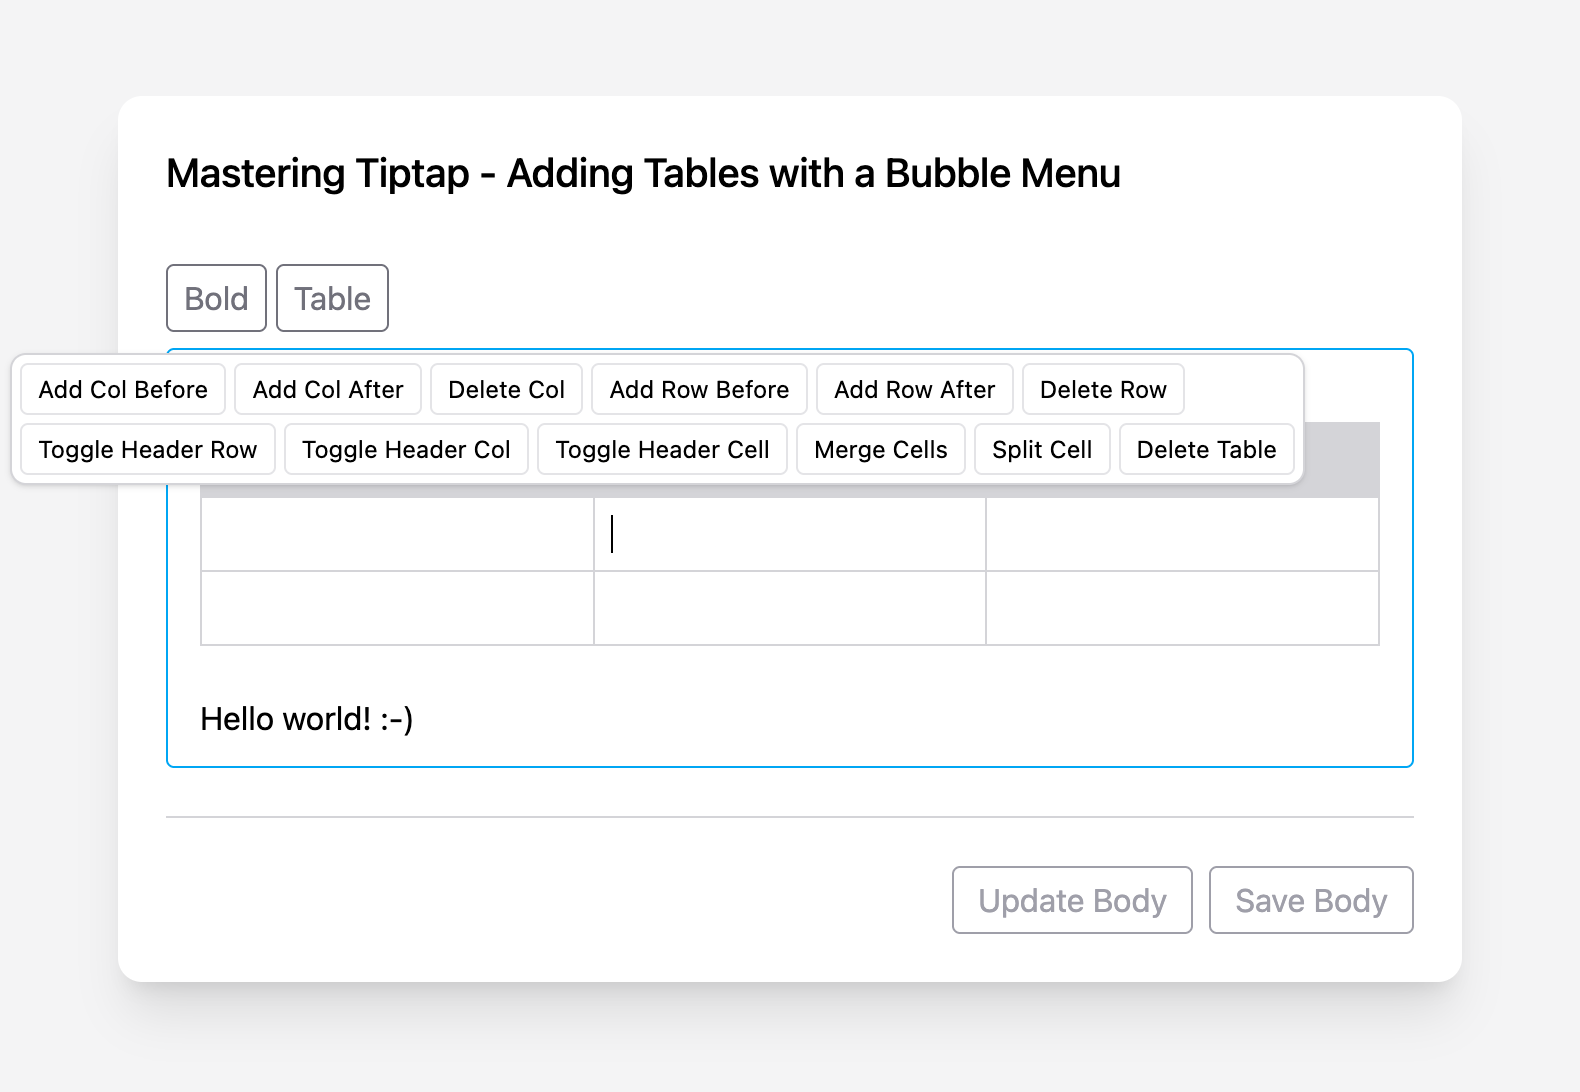
So let’s start off this time by first showing what we are going to build:
- a button to insert a table
- when you click in a table cell, a BubbleMenu appears with buttons to edit the table

Install the Tiptap extensions
Let’s go ahead and install the Table extensions and the BubbleMenu extension:
npm install @tiptap/extension-table @tiptap/extension-table-row @tiptap/extension-table-header @tiptap/extension-table-cell @tiptap/extension-bubble-menuAdding the table button
Let’s add the table button and make sure it can insert a table into our editor.
resources/views/components/tiptap.blade.php
<div x-data="tiptap($wire.entangle('{{ $attributes->wire('model')->value() }}'))" wire:ignore {{ $attributes->whereDoesntStartWith('wire:model') }}> <div x-ref="toolbar" class="mb-2"> <x-tiptap-button @click="toggleBold()" x-bind:class="{ '!bg-sky-500 !border-sky-500 !text-white' : isActive('bold', updatedAt) }">Bold</x-tiptap-button> <x-tiptap-button @click="insertTable()">Table</x-tiptap-button> // [tl! focus] </div> <div x-ref="editor" class="px-4 py-3 border rounded border-zinc-500 text-zinc-500 focus-within:border-sky-500"></div></div>We will add the BubbleMenu functionality later, but first get the table insert working by adding the following code to our app.js file:
resources/js/app.js
import { Editor } from '@tiptap/core'import StarterKit from '@tiptap/starter-kit'import Table from '@tiptap/extension-table' import TableCell from '@tiptap/extension-table-cell' import TableHeader from '@tiptap/extension-table-header' import TableRow from '@tiptap/extension-table-row' document.addEventListener('alpine:init', () => { Alpine.data('tiptap', (content) => { let editorextensions: [ StarterKit, Table.configure({ resizable: true, }), TableCell, TableHeader, TableRow, ],onCreate({ editor }) { _this.updatedAt = Date.now()},toggleBold() { editor.chain().focus().toggleBold().run()},insertTable() { editor.commands.insertTable({ rows: 3, cols: 3, withHeaderRow: true }) }, And lastly, to make sure the table looks nice, we add the following CSS:
resources/css/app.css
p:first-child { margin-top: 0;} table { border-collapse: collapse; margin: 0; overflow: hidden; table-layout: fixed; width: 100%; td, th { @apply border border-zinc-300; box-sizing: border-box; min-width: 1em; padding: 6px 8px; position: relative; vertical-align: top; >* { margin-bottom: 0; } } th { @apply border border-zinc-300 bg-zinc-300; font-weight: bold; text-align: left; } .selectedCell:after { @apply bg-sky-100/50; content: ""; left: 0; right: 0; top: 0; bottom: 0; pointer-events: none; position: absolute; z-index: 2; } .column-resize-handle { @apply bg-sky-500; bottom: -1px; pointer-events: none; position: absolute; right: -1px; top: 0; width: 2px; }} .tableWrapper { margin: 1.5rem 0; overflow-x: auto;} .resize-cursor { cursor: ew-resize; cursor: col-resize;}Resizing Columns
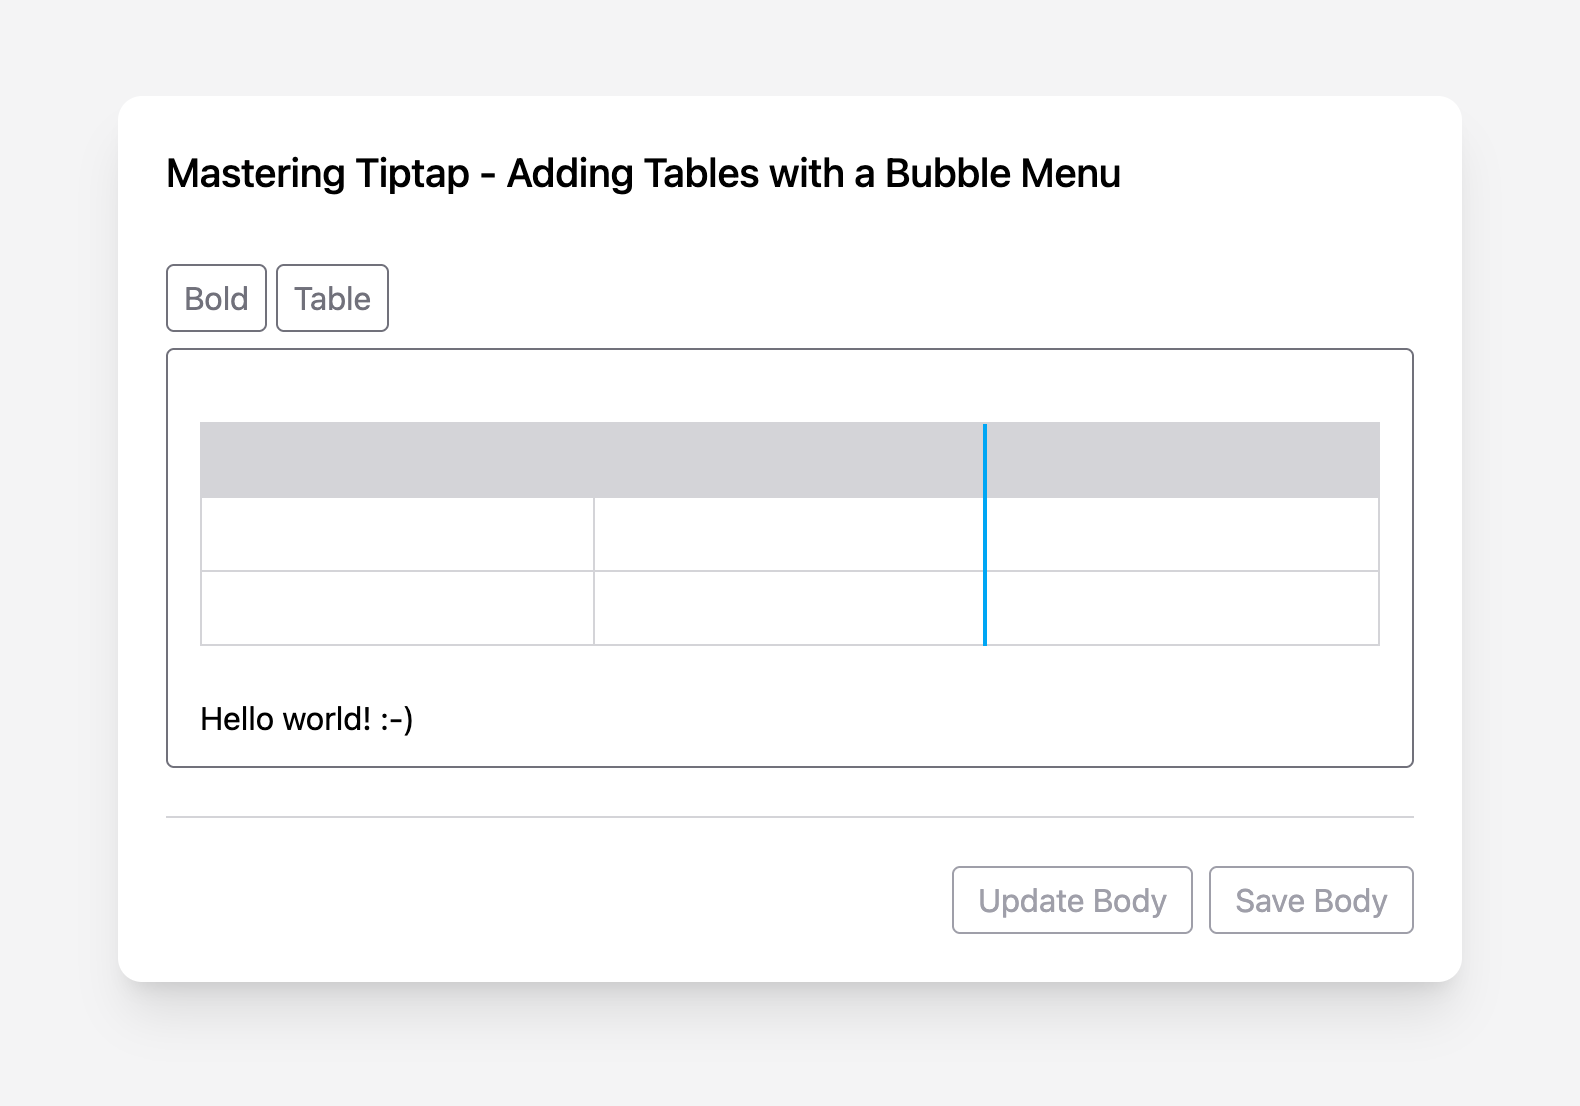
So now we have a nice button and we can insert a table into the editor. Have you noticed that when you hover over a border, a resize cursor shows and you can resize the column width? Neat, right!

This is achieved with the resizable configuration. If you don’t want this, you can remove the configure option from the Table extension:
Table.configure({ resizable: true, }), Table, Adding a BubbleMenu to the Table
Here comes the fun part (and the whole reason for these articles). Adding the BubbleMenu is straightforward. Let’s start with the HTML and then move on to the JavaScript.
resources/views/components/tiptap.blade.php
<div x-ref="editor" class="px-4 !py-3 border rounded border-zinc-500 focus-within:border-sky-500"></div> <div id="table-bubble-menu" class="flex flex-col gap-1"> // [tl! focus] <div class="flex gap-1"> // [tl! focus] <x-tiptap-button small @click="addColumnBefore()">Add Col Before</x-tiptap-button> // [tl! focus] <x-tiptap-button small @click="addColumnAfter()">Add Col After</x-tiptap-button> // [tl! focus] <x-tiptap-button small @click="deleteColumn()">Delete Col</x-tiptap-button> // [tl! focus] <x-tiptap-button small @click="addRowBefore()">Add Row Before</x-tiptap-button> // [tl! focus] <x-tiptap-button small @click="addRowAfter()">Add Row After</x-tiptap-button> // [tl! focus] <x-tiptap-button small @click="deleteRow()">Delete Row</x-tiptap-button> // [tl! focus] </div> // [tl! focus] <div class="flex gap-1"> // [tl! focus] <x-tiptap-button small @click="toggleHeaderRow()">Toggle Header Row</x-tiptap-button> // [tl! focus] <x-tiptap-button small @click="toggleHeaderColumn()">Toggle Header Col</x-tiptap-button> // [tl! focus] <x-tiptap-button small @click="toggleHeaderCell()">Toggle Header Cell</x-tiptap-button> // [tl! focus] <x-tiptap-button small @click="mergeCells()">Merge Cells</x-tiptap-button> // [tl! focus] <x-tiptap-button small @click="splitCell()">Split Cell</x-tiptap-button> // [tl! focus] <x-tiptap-button small @click="deleteTable()">Delete Table</x-tiptap-button> // [tl! focus] </div> // [tl! focus]</div> // [tl! focus]Now there is a small small attribute we can use for the Tiptap button! This means we need to update our tiptap-button component like so:
resources/views/components/tiptap-button.blade.php
<button type="button" {{ $attributes }} @class([ 'px-2 py-1 transition border rounded cursor-pointer hover:bg-sky-100 hover:border-sky-500 hover:text-sky-500', 'border-zinc-500 text-zinc-500' => !$attributes->has('small'), 'text-xs border-zinc-200' => $attributes->has('small'), ]) // [tl! focus]>{{ $slot }}</button>You'll notice I’ve written out all the buttons. This is to keep it consistent and clear what each button does. In real applications, I use icons instead. That saves space and makes the layout cleaner.
Let’s add the BubbleMenu configuration to the extensions list.
resources/js/app.js
TableRow,BubbleMenu.configure({ element: document.getElementById('table-bubble-menu'), tippyOptions: { theme: 'customTheme', arrow: false, offset: [0, 15], }, shouldShow: ({ editor }) => { return editor.isActive('table') || editor.isActive('tableCell') || editor.isActive('tableHeader') || editor.isActive('tableRow'); } }), There are a few things to notice here:
- We get the ID for the
elementthat contains all of our buttons. - Since BubbleMenu uses the Tippy library, we can configure styling easily.
- The
shouldShowfunction limits when the BubbleMenu appears—only for table-related elements.
resources/css/app.css
[data-theme="customTheme"] { @apply !max-w-full p-1 bg-white border rounded-lg shadow border-zinc-300; .tippy-content { @apply !p-0; }}After this, we only need to add the button functionality and we’re done!
resources/js/app.js
insertTable() { editor.commands.insertTable({ rows: 3, cols: 3, withHeaderRow: true })},addColumnBefore() { editor.chain().focus().addColumnBefore().run() }, addColumnAfter() { editor.chain().focus().addColumnAfter().run() }, deleteColumn() { editor.chain().focus().deleteColumn().run() }, addRowBefore() { editor.chain().focus().addRowBefore().run() }, addRowAfter() { editor.chain().focus().addRowAfter().run() }, deleteRow() { editor.chain().focus().deleteRow().run() }, toggleHeaderColumn() { editor.chain().focus().toggleHeaderColumn().run() }, toggleHeaderRow() { editor.chain().focus().toggleHeaderRow().run() }, toggleHeaderCell() { editor.chain().focus().toggleHeaderCell().run() }, mergeCells() { editor.chain().focus().mergeCells().run() }, splitCell() { editor.chain().focus().splitCell().run() }, deleteTable() { editor.chain().focus().deleteTable().run() }, As you can see, there are a lot of options for both the Table and the BubbleMenu extensions. Be sure to check the Tiptap documentation for all available options.
Next up: handling images!